Honeycomb Alpha Under Desk Mount

If you own a Honeycomb Alpha Yoke and want to mount it under your desk, you’re not alone. I didn’t realize until after I purchased the Yoke how non-trivial getting it mounted beneath my desk would be. With no accessories officially available from Honeycomb and no third-party options that fit my needs, I quickly decided it was time for another project.
To start, a few design constraints.
- Share space with a keyboard.
- Mount beneath the desktop.
- Easy to swap between keyboard and yoke mode.
- Sturdy with no wobble
I started with an admittedly expensive purchase, a VIVO computer keyboard under desk mount. It has a metal under desk track and sliding adjustable arm. The included keyboard tray is currently sitting in my closet. Instead, I designed a minimalist keyboard tray that mounts to the adjustable arm and holds my keyboard securely with a much smaller footprint. Ultimately, the best part of this mounting system is that I can pull it out of the slider with ease to make room for the Yoke.

I found 1/16 inch C-bracket aluminum extrusion at Lowe’s, which acts as both the slider and a flat mounting surface. I used aluminum for strength and my 3D printer to dial in the fits — designing a sleeve to go over the aluminum to match the size of the VIVO track, and a bracket to hold the two C-brackets the correct distance apart.
The next challenge was connecting the rails to the Yoke itself. I picked up a 1/8 inch aluminum flat bar from Lowe’s and cut it to the width of the Yoke, with a little extra on each side to serve as locking wings later. For drilling the mounting holes, I found a 3D model of the Alpha Yoke online and printed a drilling template — a time saver that got me close, though I found the real holes ran about 1mm wider than the model suggested. With the holes drilled, I tapped them directly into the aluminum to mount the C-bracket rails flush against the bar, which was my first real-world use of a tapping kit outside of practice runs.
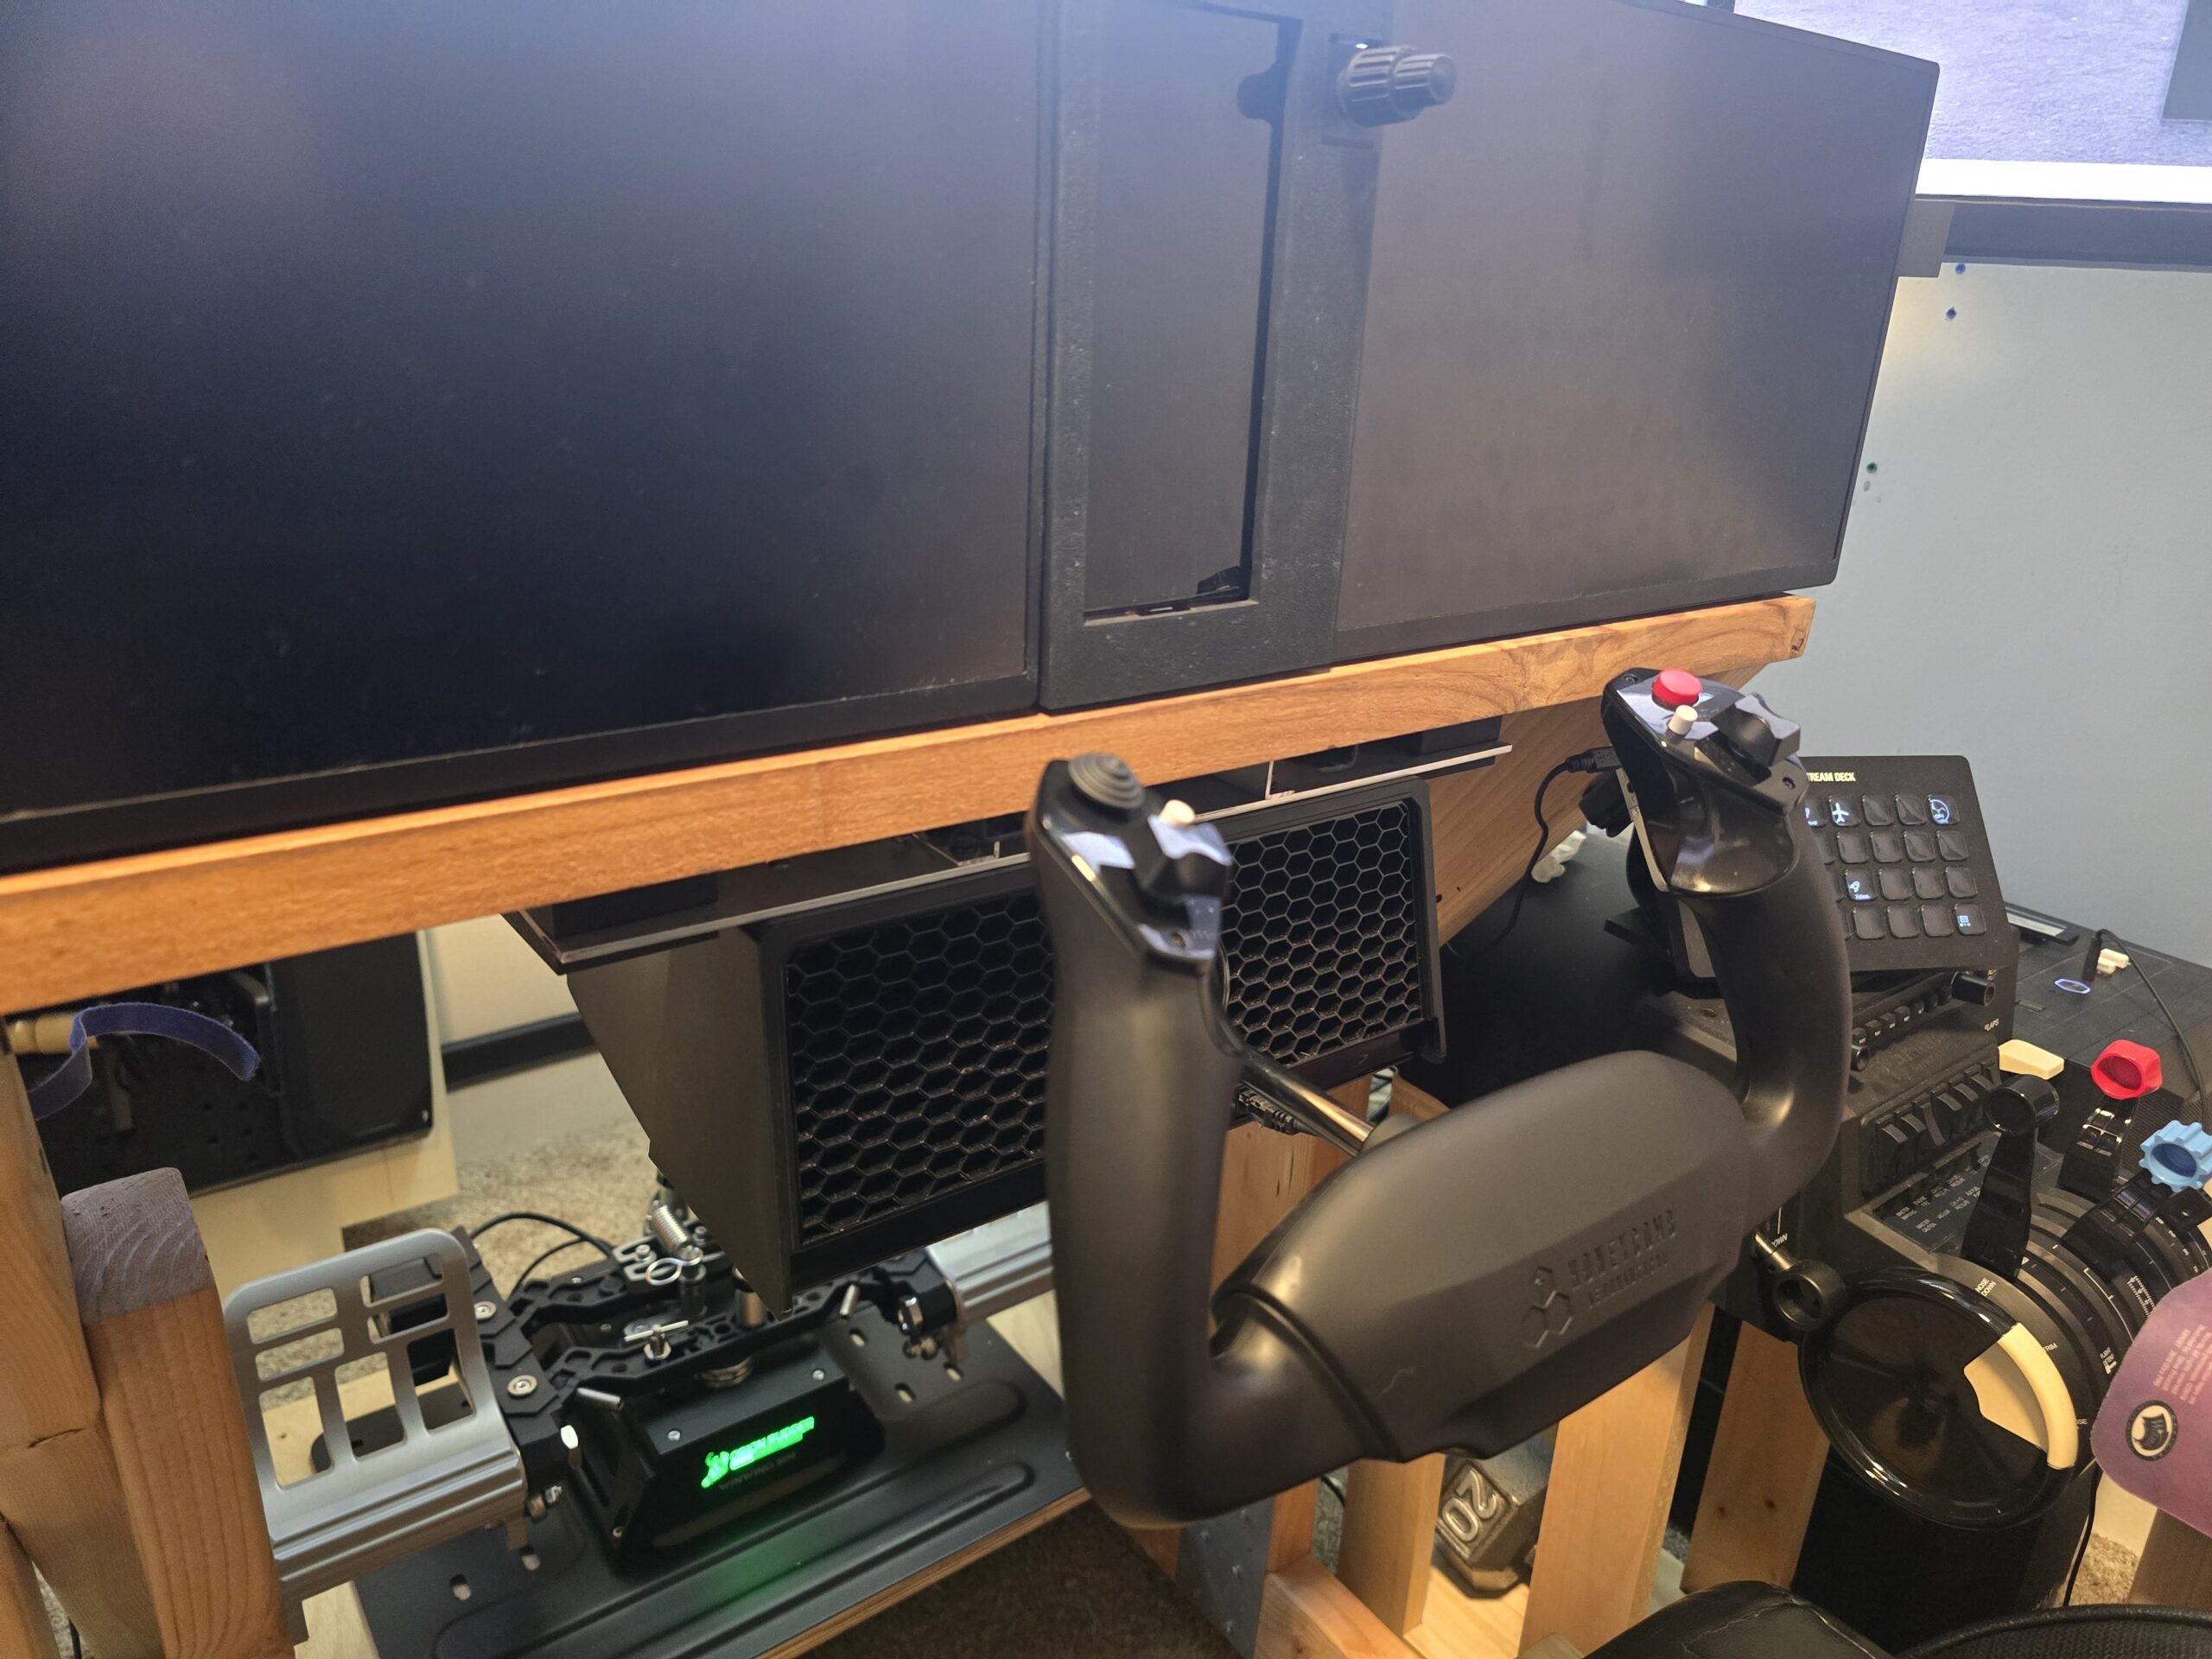
With the sliding assembly complete, I mounted it to the flat bar by drilling through both and tapping the holes — the 3D printed spacing bracket made it straightforward to keep everything parallel during drilling. At this point the Yoke could slide in and out of the VIVO track, but sufficient pulling force would drag it out entirely. Not ideal when you’re hauling back on final approach.
The solution was a set of 3D printed locking blocks that fill the gap between the aluminum wings and the underside of the desktop. Each block has an embedded nut and a bolt that the user can tighten to lock the Yoke firmly in place. In practice, the friction fit alone is tight enough that normal yoke forces don’t move it — but the bolts are there as a backup if needed.

The finished mount is solid, wobble-free, and swapping between keyboard and Yoke mode takes about five seconds. All four design constraints met. The 3D printed locking blocks are the one component I’m watching — the friction fit is tight enough that I’m not sure how long before stress builds up, and I may revise them slightly to rely more on the bolts than the friction. I’ll update this post if anything breaks. In the meantime, I’ve made the 3D print files available below — if you build your own version or improve on the design, I’d love to hear about it in the comments.